This page focuses mainly on how to use the iPAQ with respect to
networking and other tasks that a user is likely to find particularily
useful (and different from other Windows® operating system environments). For
information about functions not documented here, please see:
"User's Guide HP iPAQ Pocket PC h5100 and h5500 series", Document Part Number: 304926-001, May 2003
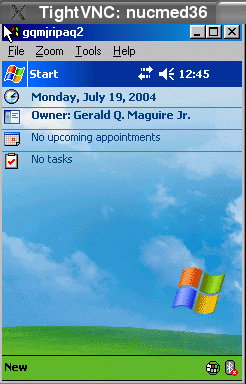 | The images shown on this
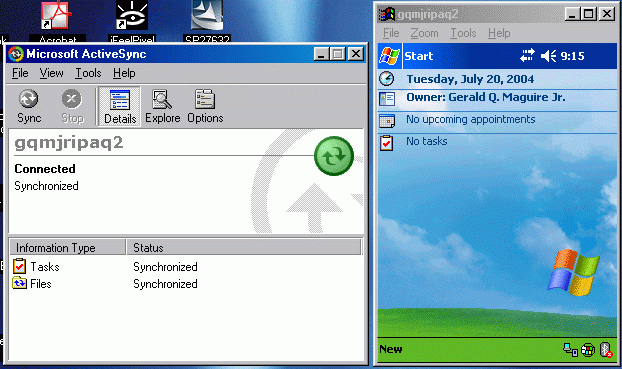
page were obtained by running VNC from an linux machine to a
Windows® 98
machine running a Remote Display client to an iPAQ (whose name is
"gqmjripag2"). This figure shows the VNC window, with a
Remote Display window within it, with
the information displayed on the iPAQ's screeen inside that.
An alternative means of screen capture is to use the
built-in iTask Capture
function. This has the advantage that you only need to use the
iPAQ.
|
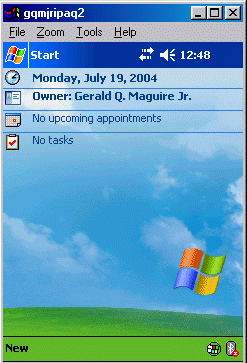 | Note
(from left to right and top to bottom):
- Top line:
- Clock icon (invokes clock setting functions) + date
- Contact icon (involves functions for accessing
contact information) + name of the owner
- Calendar icon (involves calendar functions) + upcoming
appointments
- Tasks icon (involves task management functions) + list
of upcoming tasks
- Bottom line:
- "New" label invokes a menu to create various "New" items
- Remote Display Control logo
- The Bluetooth® logo which invokes the Bluetooth® manager (described
later) is in the lower righthand corner
|
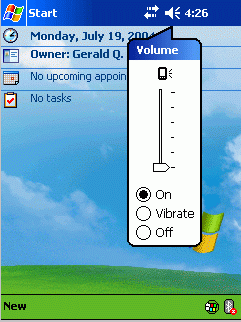 |
Clicking on speaker icon allows the user to adjust the volume or put the device into
vibrate mode |
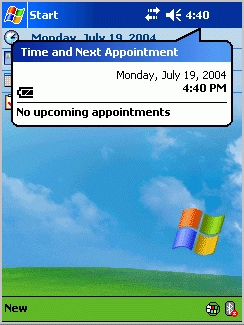 |
Time and next appointment - bubble which appears if you click on the time |
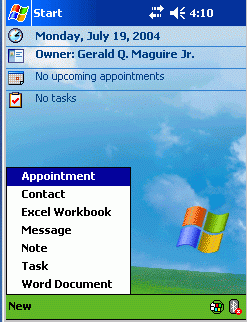 |
Clicking on "New" menu allows the user to create a new XXX, where XXX is one of
Appointment/Contact/Excel Workbook/Message/Note/Task/Word Document |
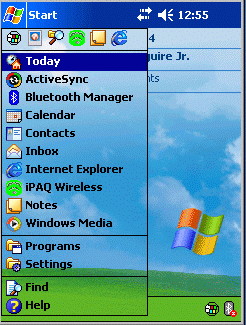 |
Clicking on "Start" reveals this list of operations. |
|
Connectivity |
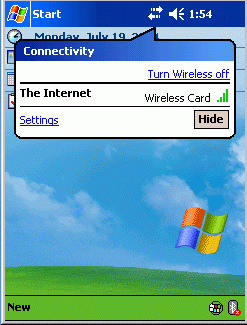 |
Clicking on the connectivity arrows with WLAN on; enables you to
turn WLAN on or off and change the connectivity settings |
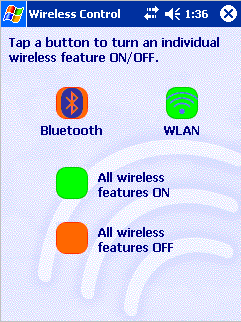 |
You can also use the "Start" menu item "iPAQ Wireless" to invoke
this control panel which lets you turn on and off the WLAN and
Bluetooth® wireless interfaces.
You may also need to know your MAC address if you are going to setup a
DHCP server (with static addresses) or for MAC address filtering in by
a firewall, etc. To find the WLAN interface's MAC address you can use
the system settings Asset Viewer.
|
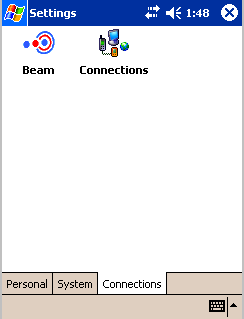 |
You can also reach the connectivity settings via the "Settings" menu and then
clicking on the Connections icon |
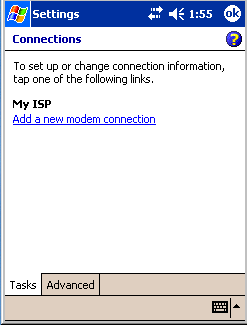 |
Settings→Connections→Task
|
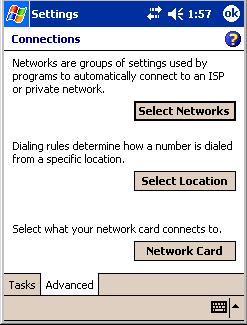 |
Settings→Connections→Advanced - choosing:
|
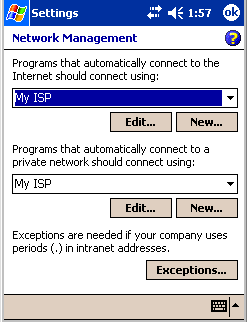 |
This screen (reached from "Select Nework") lets you select which network you want to use for
accessing both the Internet and a private network. It is important to
note that if you choose "My Work Network" for access a private network
that it expects that you will access this network via VPN and possibly
a proxy.
|
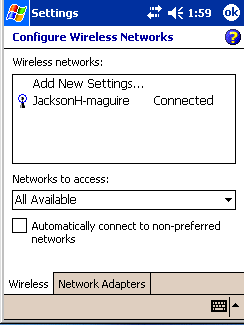 |
If you have a Wireless network enabled the "Network Card"
selection will take you here. Otherwise you will get a screen to
enable you to set up your Network Adaptors |
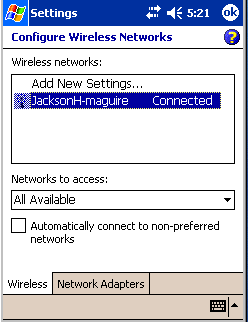 |
If you have a Wireless network enabled the "Network Card"
selection will take you here; where you can select a specific wireless network (here
there is only one choice) |
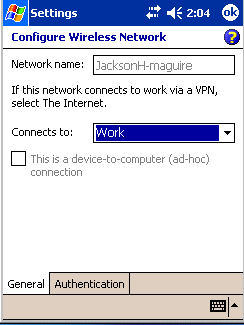 |
Here you can set the name of the wireless network which you want to
access - it is very important that you say that this connects to a
"Work" network unless you are using a VPN.
Once you do this you should select the
Wireless network
authentication mechanism. |
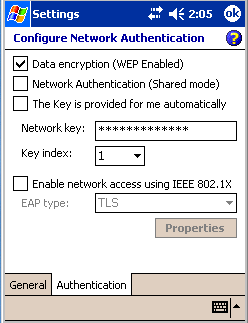 |
Using this screen you can select the appropriate method of
authentication; in this case Wire Equivalent Privacy (WEP) using a
static password was selected.
After selecting this click the "OK"
button to return to the Configure Network Adapters screen.
|
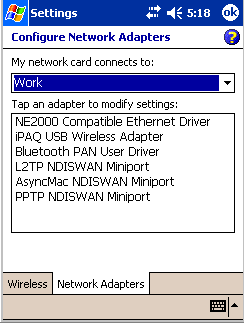 |
If you have a Wireless network enabled the "Network Card"
selection will take you here. Otherwise you will get a screen to
enable you to set up your Network Adaptors.
This is also reachable via
Settings→ Connections→ Advanced→ Network_card→ Network_Adaptors.
We will next select iPAQ_USB_Wireless_Adaptor to
continue setting up the WLAN interface.
|
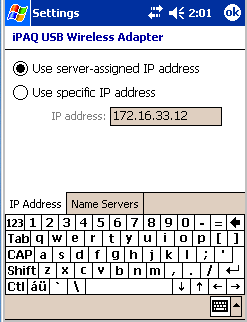 |
Here we can either statically set the IP address of the WLAN
interface or we can utilize DHCP to request an address.
This screen is also reachable via
Settings→ Connections→ Advanced→ Network_card→ Network_Adaptors→ iPAQ_USB_Wireless_Adaptor.
You can verify the DHCP address assignment with the PocketDHCP utility program.
|
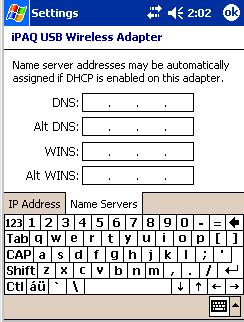 |
Using this page you can set the DNS address and an alternate DNS
address. You can also set the WINS address and an alternate.
If you are using DHCP will not need to manually set these values.
After you click OK, you will return to the list of Network Adapters.
This screen is also reachable via
Settings→ Connections→ Advanced→ Network_card→ Network_Adaptors→ iPAQ_USB_Wireless_Adaptor→ Name_Servers
|
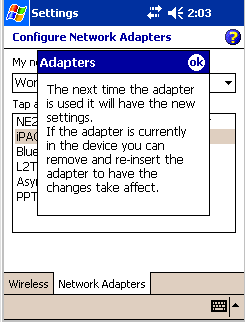 |
If you click OK on this page, the adapter will be configured as
you request the next time it is used. |
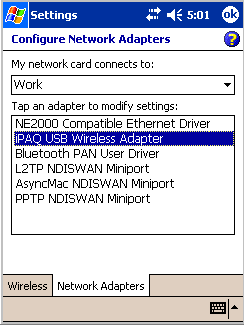 |
After clicking OK, you are returned to the Configure Network
Adaptors page |
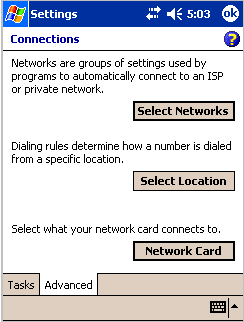 |
After clicking OK, you are returned to the Connection settings
Advanced page |
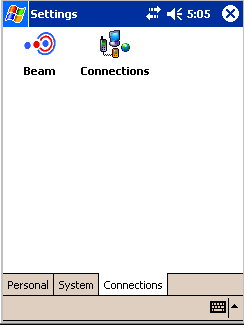 |
After clicking OK, you are returned to the Connection settings
Advanced page (clicking OK from this page returns you to the
main screen) |
| Using Internet Explorer to
access network resources |
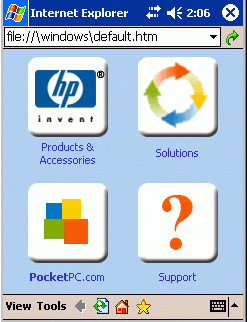 |
If from the Start menu you invoke Internet Explorer you get the
following default page: "file://\\windows\default.htm". Of course if
you would like to have some other page |
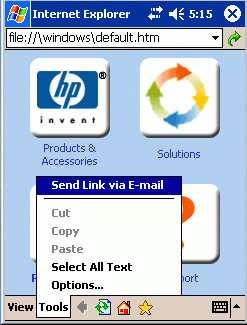 |
You can of course configure Internet Explorer to use a different
default page, etc. by tapping the "Tools" label. |
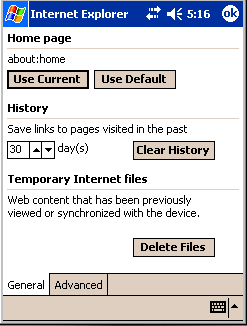 |
After tapping Tools→Options, you get the General Options configuration page. |
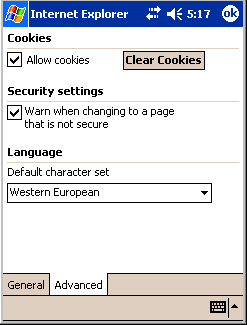 |
From the General page you can get the Advanced Options configuration page. |
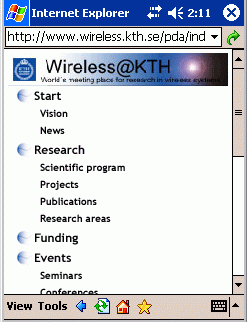 |
Now that you have your WLAN configured, if you have a connection
between this WLAN and the Internet you can go to other locations, such
as the Center for Wireless Systems at KTH http://www.wireless.kth.se/
Note that this server is setup to recognize that the browser you are
using is operating on a PDA, thus it actually delivers to you
information from the root page http://www.wireless.kth.se/pda.
These pages are optimized for display on a devices with a small screen.
|
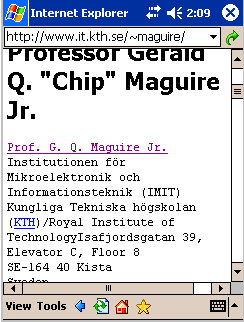 |
You can also go to lots of other locations, such
as my home page at KTH http://www.it.kth.se/~maguire/
internet_explorer-kth-imit-maguire.gif |
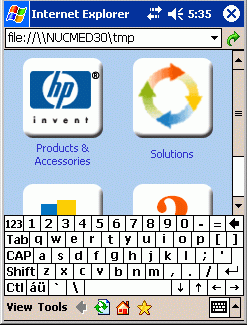 |
Just as we can access web pages via HTTP, Internet Explorer can
also access files using SMB (for example from a Samba server). Here we
have entered the name of the remote file system: file://\\NUCMED30\TMP
(where "\\NUCMED30" is the machine name and "\TMP" is the exported TMP
directory).
Note that the popup keyboard was used to enter the pathname. |
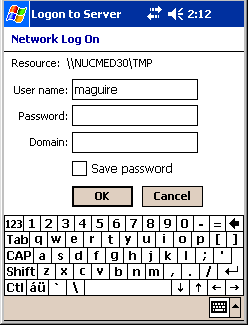 |
The user is now prompted to enter their user name, password,
etc. for access to this remote file server. (This screen shot shows
the screen just after the user has entered their name.) |
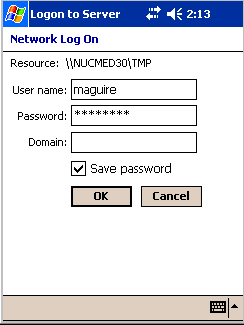 |
The user has now filled in their password.
Note that the user can ask the system to remember this password. This
is very convenient if you are going to return to this file server frequently.
|
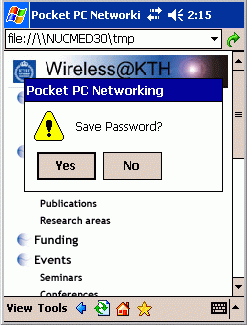 |
The user will be ask to confirm that they wish the password
saved. Then the user will see the contents of the directory "\TMP". |
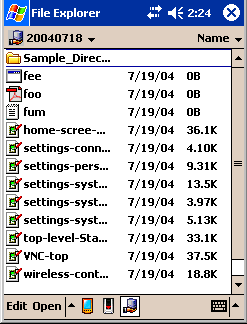 |
Here the user has browsed to the subdirectory "\TMP\20040718".
Note that the files are shown with different icons (based on their
file extention, not based on the file contents - as can easily be seen
from the files which are zero bytes in size).
|
| Bluetooth® |
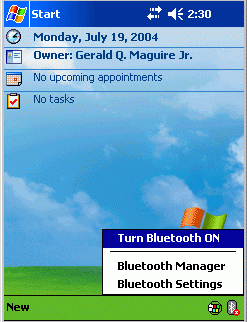 |
The Bluetooth® interface can be turned on/off via the Bluetooth® Manager
icon in lower righthand corner of the screen. |
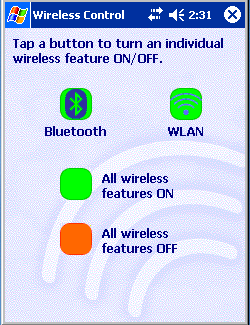 |
The Bluetooth® interface can also be turned on via the Settings→iPAQ_wireless (Wireless Control) page |
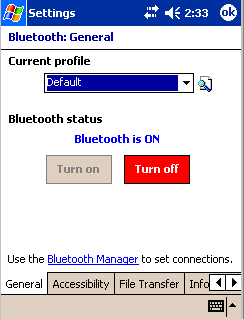 |
Here we assume that the user has selected Bluetooth® Settings, this
takes the user to the Bluetooth® General settings page.
Note that this page can also be reached via Settings→ System→ Bluetooth®→ Accessibility
|
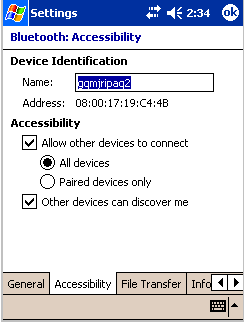 |
From the Settings→ Bluetooth®→ Accessibility page you can set if
other devices can discover your and if they are allowed to connect or
if they must be paired. This page also shows the Bluetooth® interface
MAC address.
|
 |
As an aside it should be noted that unlike the WLAN interface, the
Settings→Asset_Viewer does not show the Bluetooth®
interface's MAC address. |
 |
Bluetooth® devices can support many different services. Each of
these services is part of a profile. Some of these services
are controlled by this and the following setup screens. For details of
what services exist, what services are required, details of various
profiles, etc. see the Bluetooth® SIG site.
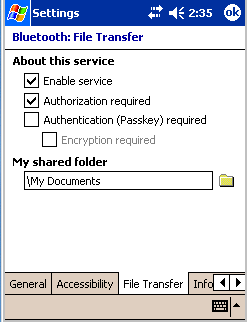
Settings→ System→ Bluetooth®→ File_Transfer allows you to set the
parameters for (OBEX) File Transfer via Bluetooth®, including the name of a
directory (folder) which you would like to share with others. |
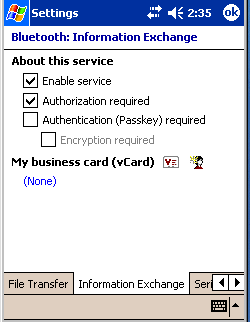 |
Settings→ System→ Bluetooth®→ Information_Exchange enables you to
setup information for exchanging with others, for example your "vCard"
(an electronic business/visit card). |
 |
Settings→ System→ Bluetooth®→ Information_Exchange enables you to
setup information for exchanging with others. Here a sample "vCard"
is shown. |
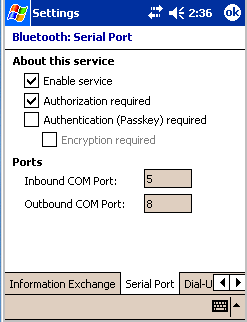 |
Settings→ System→ Bluetooth®→ Serial_Port lets you setup one or two
serial (COM) links. |
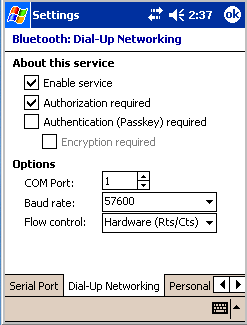 |
Settings→ System→ Bluetooth®→ Dialup_Networking lets you set up a
dialup connection. |
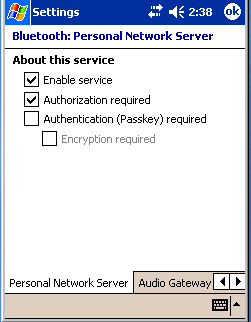 |
Settings→ System→ Bluetooth®→ Personal_Network_Server lets you set
up a personal network server for use by others. |
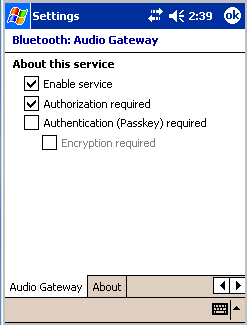 |
Settings→ System→ Bluetooth®→ Audio_Gateway allows you to set up an
Audio Gateway (providing remote audio service). |
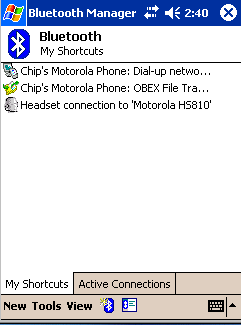 |
Here we assume that the user has selected the Bluetooth®
Manager. The Bluetooth® manage shows that it knows about two different
devices (with two different services being offered by the first
device). The devices are: "Chip's Motorola phone" and a MOTOROLA® HS810
(headset). The user taps on "Motorola HS810" headset.
palowireless' Wireless Resource Center has descriptions of some of the various Bluetooth®
profiles.
|
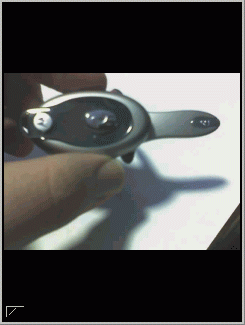 |
Here we will assume that the user has folded out the microphone
boom of this headset (as shown in the picture to the left). This
causes the headset to indicate that it is ready to offer Audio
service.
Note: This picture was actually taken using the Motorola
phone's built in camera to take a picture of the headet. The file was
transferred to the iPAQ using the OBEX file transfer service. The
image was then displayed on the iPAQ using the imageviewer application
and the resulting screen captured. |
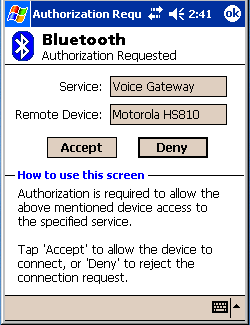 |
After the user tapped on "Motorola HS810" headset the user is ask
if they want to accept voice gateway services from this device. If
they accept this service (and the MOTOROLA® HS810 provides this
service), then the user will hear the audio output of the
application(s) runing on the iPAQ via this headset.
My personal impression is that while this might be suitable for human
voice it is quite poor for entertainment audio.
|
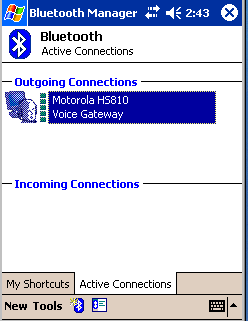 |
Using the Bluetooth® Manager we can see that an outgoing audio
connection is active to this headset. |
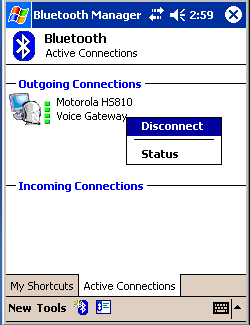 |
Tapping on this active connection we get a pop up menu which lets
us disconnect this connection or can take us to a page showing the
status of this connection. Here the user is choosing to disconnect. |
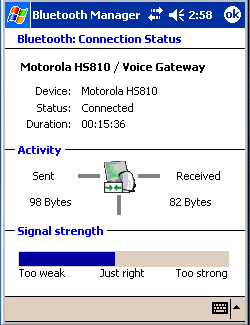 |
If the user had elected to get the status information, this is an
example of what they would see. |
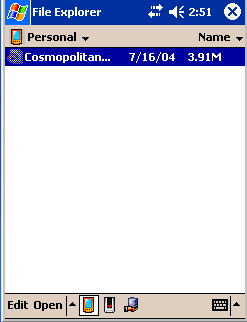 |
We can try out the audio quality of this headset, by playing an
MP3 file. In this case we use the File browser to access an MP3 file called
"CosmopolitanGirl.mp3" and shown in the list as "Cosmopolitan...". The
file was available as a freedownload from her page
http://www.janisian.com/mp3_downloads.html.
|
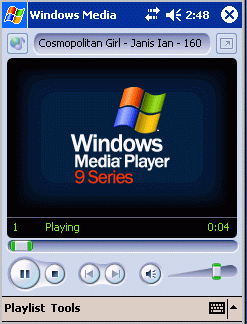 |
Clicking on the file name above invokes the Windows Media® player
application and the audio is delivered to the user via the Bluetooth® headset. |
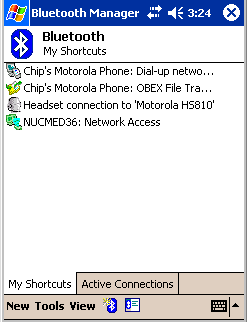 |
Using a notebook (called "NUCMED36") with a Bluetooth® interface (and other
network connection) for network access. |
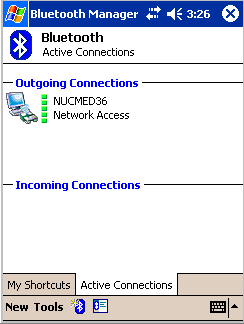 |
We can see that this network access connection via "NUCMED36 is active. |
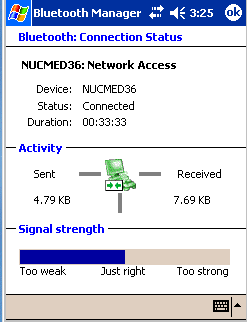 |
We can get additional information about the status of this
connection, including signal strength, bytes sent/received, and
connection time. |
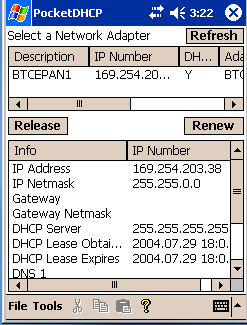 |
Using the PocketDHCP application we can see that the connection is
using an interface associated with the Bluetooth® Personal Area
Network (PAN) "BTCEPAN1" and we can see that an IPv4 Link-Local address has been
assigned using Zeroconf (since the address is in: 169.254.1.0 to
169.254.254.255 {note: the first 256 and last 256 addresses of 169.254/16 have been reserved}).
For more details of Zeroconf see the internet draft
Dynamic Configuration of Link-Local IPv4 Addresses.
Name resolution is done by sending a packet containing the requested name to the multicast broadcast address (224.0.0.251).
|
A useful tool is the Cisco (Linksys) BTSpy program. Which can
generate traces such as that shown below.
21:15:37.300 BNEP SENT Packet: Compressed Ethernet Dst (0x04)  Ext: 0  Len: 337
21:15:37.300                                 Dst Addr : ff ff ff ff ff ff
21:15:37.300                                 Protocol : 0x0800  IPv4
21:15:37.300                 IP4 Header       Len/Ver : 69 (0x45)
21:15:37.300                          Type of Service : 0 (0x00)
21:15:37.300                             Total Length : 328 (0x0148)
21:15:37.300                                    IP Id : 42400 (0xa5a0)
21:15:37.300                          Fragment Offset : 0 (0x0000)
21:15:37.300                             Time to Live : 128 (0x80)
21:15:37.300                                 Protocol : 17  UDP
21:15:37.300                                 Checksum : 37893 (0x9405)
21:15:37.300                           Source IP Addr : 0.0.0.0
21:15:37.300                             Dest IP Addr : 255.255.255.255
21:15:37.300                UDP Header    Source Port : 68 (0x0044)
21:15:37.300                                Dest Port : 67 (0x0043)
21:15:37.300                               UDP Length : 308 (0x0134)
21:15:37.300                                 Checksum : 0 (0x0000)
21:15:37.300                       DHCP       Request : 1 (0x01)
21:15:37.300                                 H/w type : 1 (0x01)
21:15:37.300                          H/w Addr Length : 6 (0x06)
21:15:37.300                                     Hops : 0 (0x00)
21:15:37.300                                      XID : 3446199400 (0xcd68d468)
21:15:37.300                                  Seconds : 4608 (0x1200)
21:15:37.300                                    Flags : 0 (0x0000)
21:15:37.300                           Client IP Addr : 0.0.0.0
21:15:37.300                             Your IP Addr : 0.0.0.0
21:15:37.300                      Next Server IP Addr : 0.0.0.0
21:15:37.300                      Relay Agent IP Addr : 0.0.0.0
21:15:37.300                           Client Hw Addr : 00 0c 41 e1 f7 a6 00 00 00 00 00 00 00 00 00 00
21:15:37.300                         Server Host Name : 00 00 00 00 00 00 00 00 00 00 00 00 00 00 00 00
21:15:37.300                           Boot File Name : 00 00 00 00 00 00 00 00 00 00 00 00 00 00 00 00
21:15:37.300                                  Options : 63 82 53 63 35 01 01 3d 07 01 00 0c 41 e1 f7 a6
21:15:37.300                           Next few bytes : 0c 09 6e 75 63 6d 65 64 33 36 00 37 08 01 03 06
21:15:37.300 BTKRNLL2CAPDataWrite lcid:0x42 len:337
21:15:37.300 L2CA_DataWrite()  CID: 0x0042  Len: 337
21:15:37.300 L2CAP - LCID: 0x0042  st: OPEN  evt: UPPER_LAYER_DATA_WRITE
21:15:37.300 --
21:15:37.300 SENT ACL Data to HCI. Handle: 0x029  Boundary: 1  Brdcst: 0  Len: 149  Data: 0x00 0x00 0x00 ...
21:15:37.300 Data:
21:15:37.300     0000: 00 00 00 00 00 00 00 00 00 00 00 00 00 00 00 00   ................
21:15:37.300     0010: 00 00 00 00 00 00 00 00 00 00 00 00 00 00 00 00   ................
21:15:37.300     0020: 00 00 00 00 00 00 00 00 00 00 00 00 00 00 00 00   ................
21:15:37.300     0030: 00 00 00 00 00 00 00 00 00 00 00 00 00 00 00 00   ................
21:15:37.300     0040: 00 00 00 00 00 00 00 00 00 00 00 00 00 00 00 00   ................
21:15:37.300     0050: 00 00 00 00 00 63 82 53 63 35 01 01 3d 07 01 00   .....c.Sc5..=...
21:15:37.300     0060: 0c 41 e1 f7 a6 0c 09 6e 75 63 6d 65 64 33 36 00   .A.....nucmed36.
21:15:37.300     0070: 37 08 01 03 06 0f 2c 2e 2f 39 ff 00 00 00 00 00   7.....,./9......
21:15:37.350     0080: 00 00 00 00 00 00 00 00 00 00 00 00 00 00 00 00   ................
21:15:37.350     0090: 00 00 00 00 00                                    .....
21:15:37.350 --
|
| Miscellaneous |
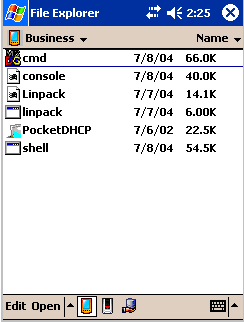 |
The local storage is divided into several parts. The left most
icon at the bottom of the page is for the local directory. |
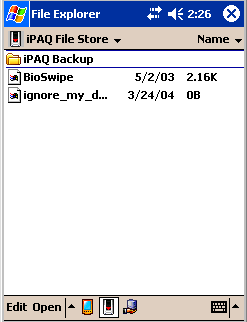 | The local storage is divided into
several parts. Another of these is the iPAQ file store. The center
icon at the bottom of the page is for the iPAQ file store. |
 | A third part of
the storage is a remote file system, here the user has browsed to the
subdirectory "\TMP\20040718". (this example was also shown above) The
right most icon at the bottom of the page is for this remote file
store. |
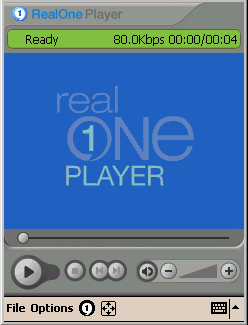 |
In addition to the Windows Media® player, there are other players
which are available, such as RealNetworks' realoneplayer. |
|
System Settings |
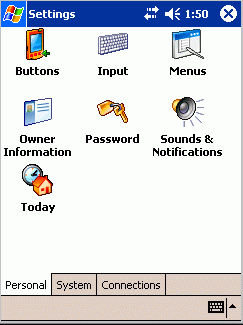 |
From the Start Menu selecting Settings takes you to the Personal
settings page. |
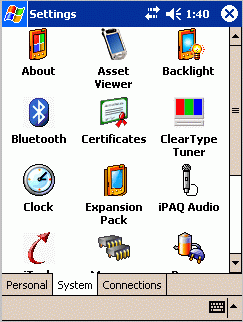 |
From the Personal settings page, you can go to the System settings
page |
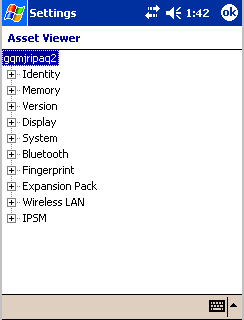 |
From within the System settings page you can select the Asset Viewer. |
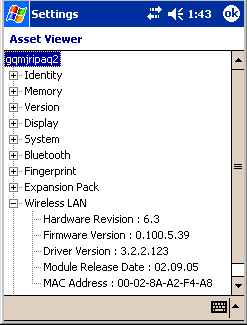 |
From the Asset Viewer, one can expand the information about
Wireless LAN (WLAN)interface, thus revealing the MAC address along
with version information about the hardware/firmware/driver. |
|
Remote display usage |
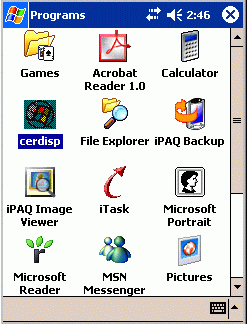 | If you want to allow the
remote display client to be able to contact this iPAQ invoke "cerdisp" |
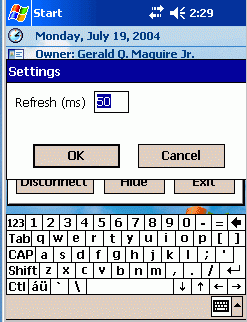 |
The remote display control settings - currently only lets you set the refresh delay |
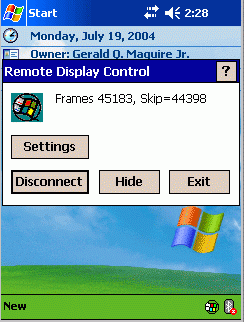 |
The remote display control panel allows you to disconnect from the server. |
Detta är en personlig hemsida och åsikter framförda
här eller i tillhandahållna länkar representerar
inte KTH.
This is a personal homepage. Opinions expressed here or implied by links
provided, do not represent the official views of KTH.
In addition to the usual disclaimer: This page is an independent
(publication) and is not affiliated with, nor has it been authorized,
sponsored, or otherwise approved by anyone. The trademarks and
registered trademarks are the properties of their respective owners.


![[disclaimer]](http://www.kth.se/bilder/disclaimer.gif)